

- There is now a Flash Movie of this howto available.
It takes a while to load, because of it's size.
NOTE: The usual Username/Password combo for Puppy sites applies
The purpose of it, is to show how to do a FULL install on an empty HDD,
it does not attempt to explain how to dual boot puppy with another already installed OS.
It also assumes that your PC is able to boot from a CD,
and that you are installing to a normal internal hard drive.
Please note that the partition sizes i used are for example only,
you should make yours to the sizes that you want.
As to the size of the SWAP partition,
it is usually recommended that it is twice the size of your RAM.
So if you have 128M of RAM, create a SWAP partititon of 256M etc,etc
Before we start, make a note of what screen resolution your graphics card/monitor can handle,
you will need this information pretty soon after booting the CD.
- Also note that because this was done using QEMU, i had to use Xvesa
therefore i cannot show any screenshots for the Xorg sequences.
QEMU is a generic and open source machine emulator and virtualizer.
For more information, visit the QEMU website
So for the purpose of this howto, just ignore the QEMU window,
you will not see it yourself, so do not expect to.
but i could not see any other way of doing it.
Part 1. Booting to the desktop.
OK then, put your Puppy LiveCD into a drive,
and REBOOT the PC.
It should automatically boot from the puppy LiveCD
If it does not, you may need to press F8 or F11 or similar when the PC
first boots, for the boot menu then select the drive that the CD is in.
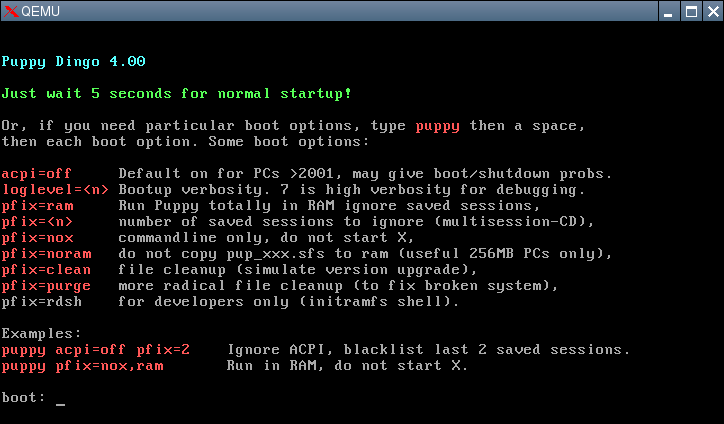
The first thing you see will be this:
Image-1
Next you will be asked to select the keyboard layout:
Image-2
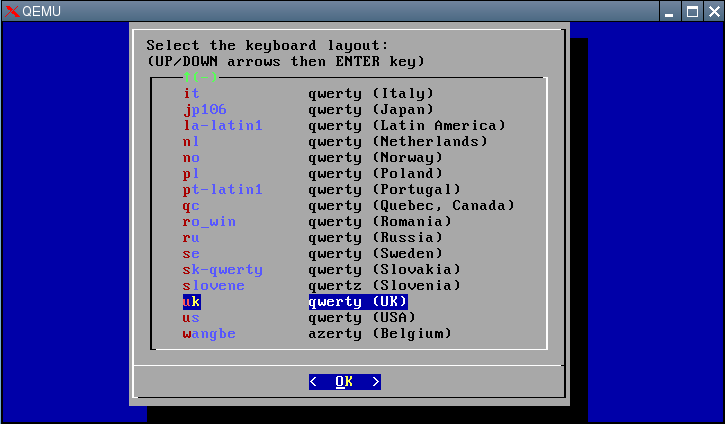
Use the Up/Down arrows on the keyboard to make your choice then press ENTER/RETURN for OK
Next you will be asked to choose either Xorg or Xvesa, make your choice (try Xorg first, if that fails then use Xvesa):
Image-3

If you need to use Xvesa use the TAB key to make your selection then press ENTER/RETURN for OK
If you chose Xorg, you then need to select a screen resolution:
Select an appropriate resolution (you made a note earlier i hope) then press ENTER/RETURN for OK
Now test it:
Again, use the TAB key to select Test, then press ENTER/RETURN for OK
If it works, thats good, if it did not, then try with Xvesa
now do the linux three finger shuffle (Ctrl + Alt + Backspace)
If you chose Xvesa you will then see this:
Image-4
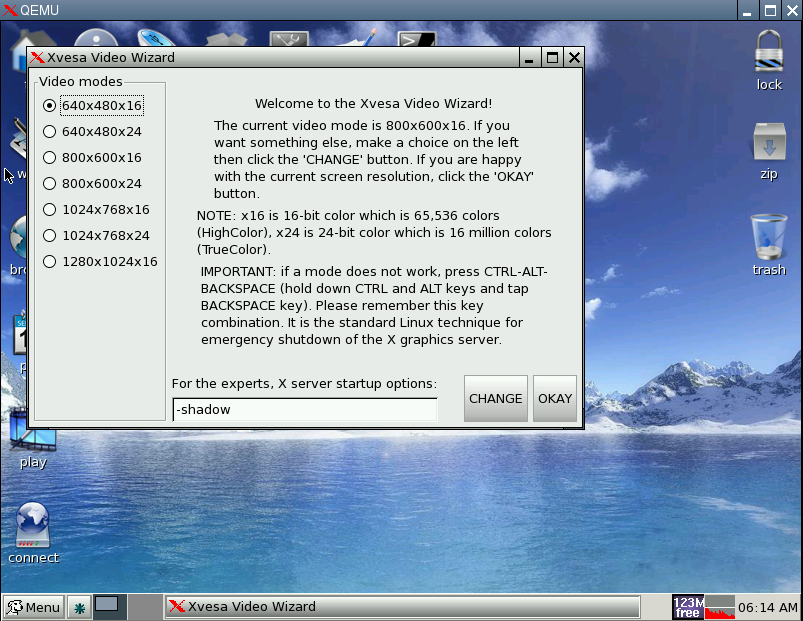
Select an appropriate resolution and click Change
When the desktop comes back up, along with the Xvesa video wizard click OKAY
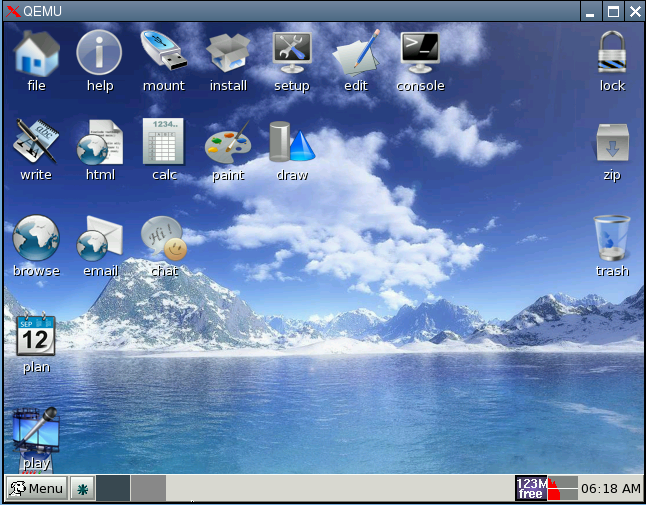
You should now be at the desktop like this:
Image-5
Part 2. Partitioning and Formatting the drive.
Now for the main part of this howto.
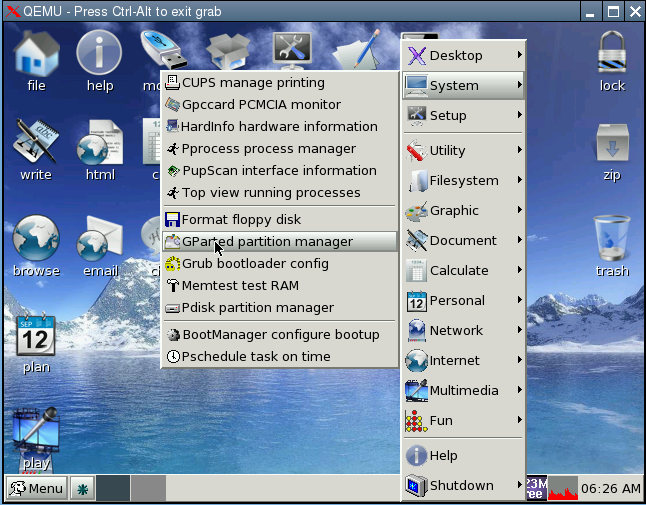
Right click the desktop to get the menu up,
now go to System > GParted partition manager
Image-6
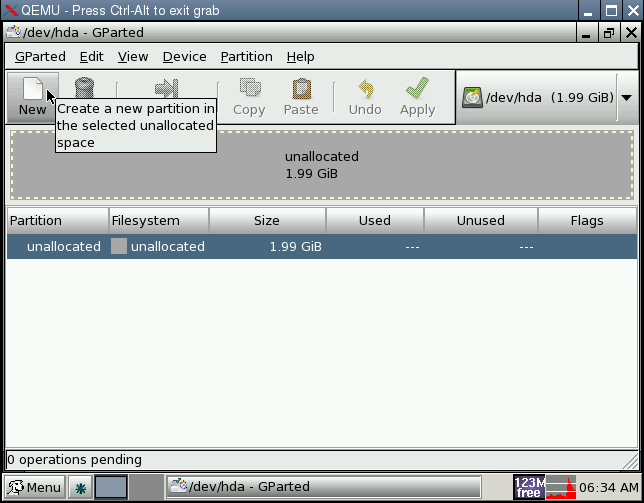
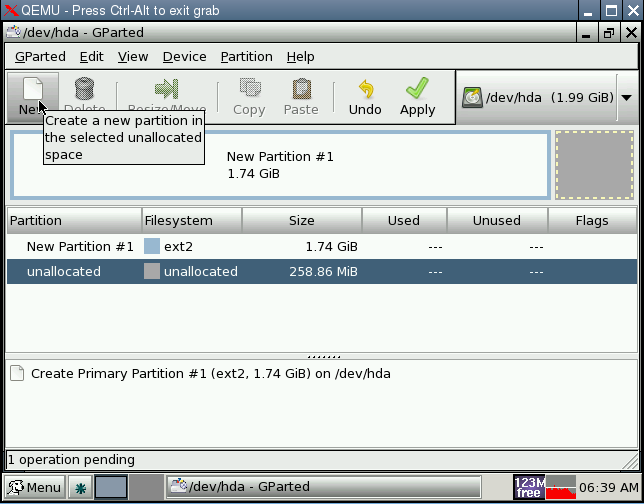
Next click to highlight where it says unallocated (where it is blue in the picture below)
Then click on New to create a new partition.
Note:
You may already have some partitions created from your previous install,
if so, then for the purpose of this Howto it is probably best to start from scratch.
So select them one at a time (starting with the bottom one) and click Delete.
Eventually you will be left with exactly what you see in the image below, this is the whole drive marked as "unallocated"
Image-7
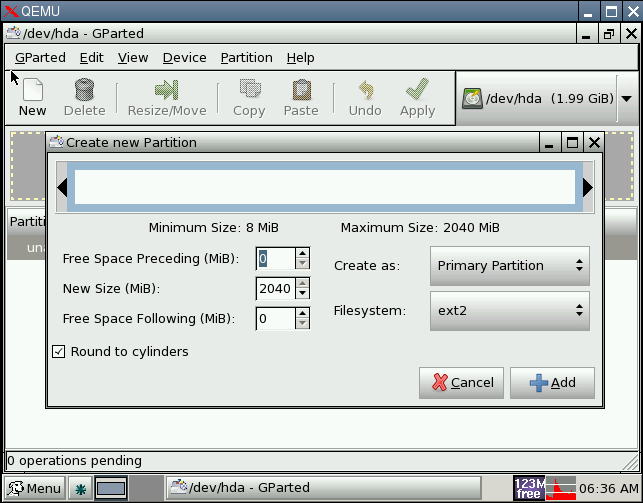
You will get something similar to this:
Image-8
Make the partition to the size you wish, as you can see below, i left enough space for the SWAP partition.
For Filesystem you can choose either ext2 or ext3.
If you are wondering what the difference is between the Filesystems,
and would like to know more, please check out the following links:
http://en.wikipedia.org/wiki/Ext2
http://en.wikipedia.org/wiki/Ext3
Image-9
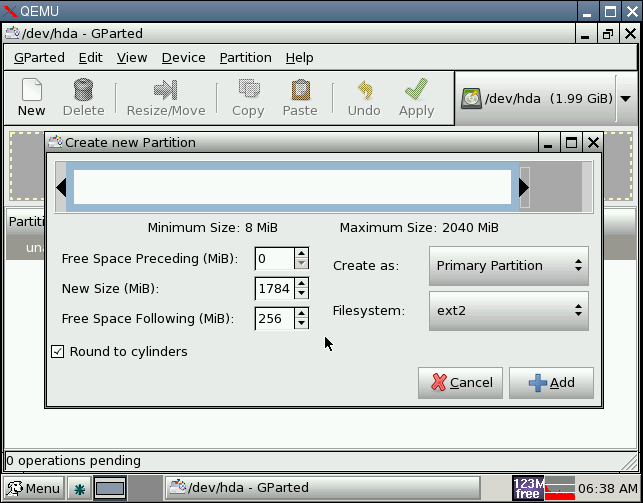
Click on Add
Once again click to highlight unallocated, then New
Image-10
Now create the SWAP partition (be sure to select linux-swap as Filesystem)
Image-11
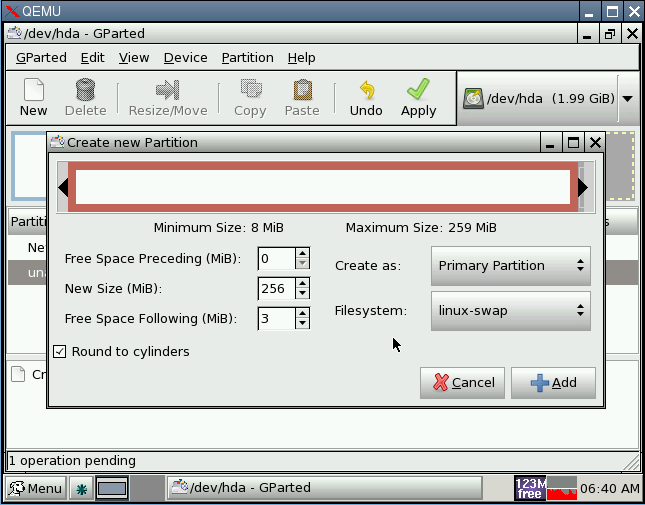
click on Add
Next click on Apply
Image-12
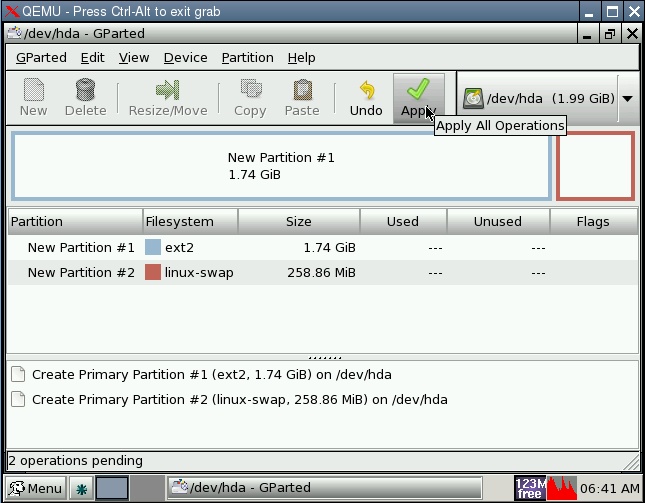
And again, click on Apply
Image-13
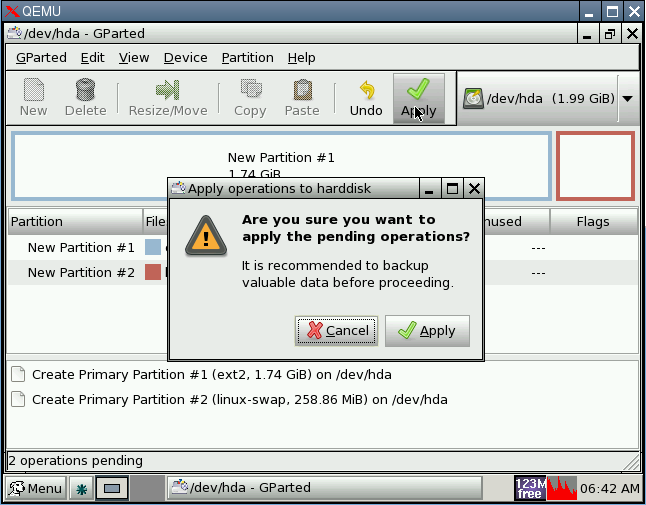
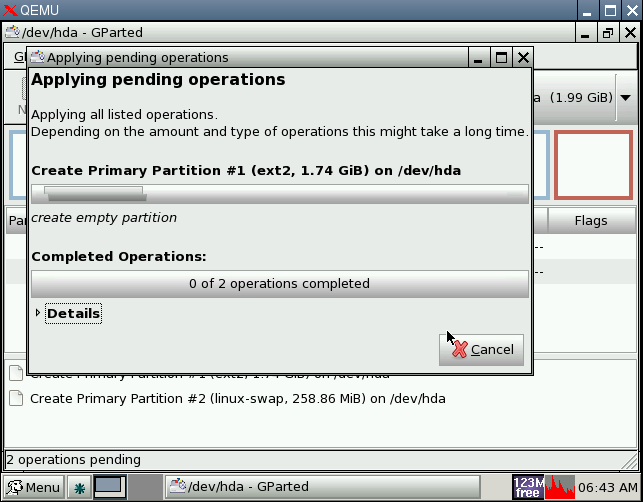
You will now see it Applying pending operations
Image-14
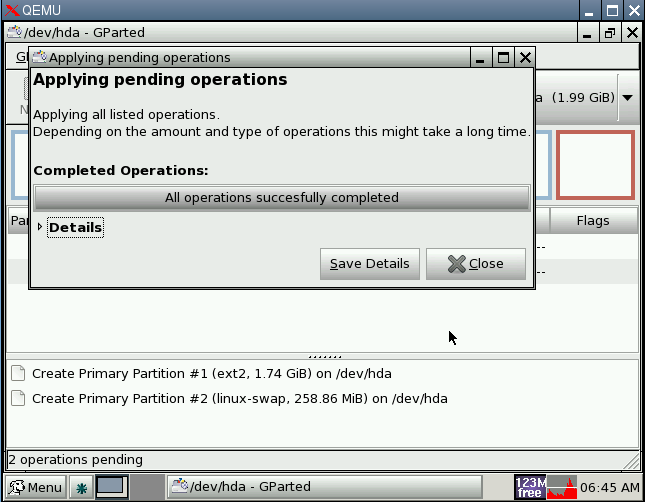
When it has finished, click on Close
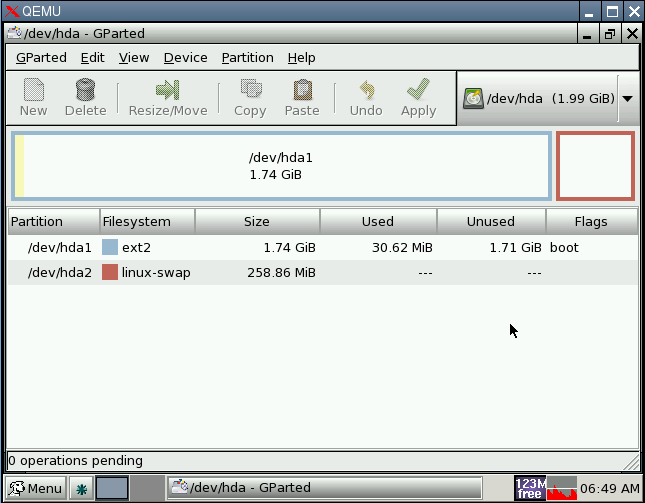
Image-15
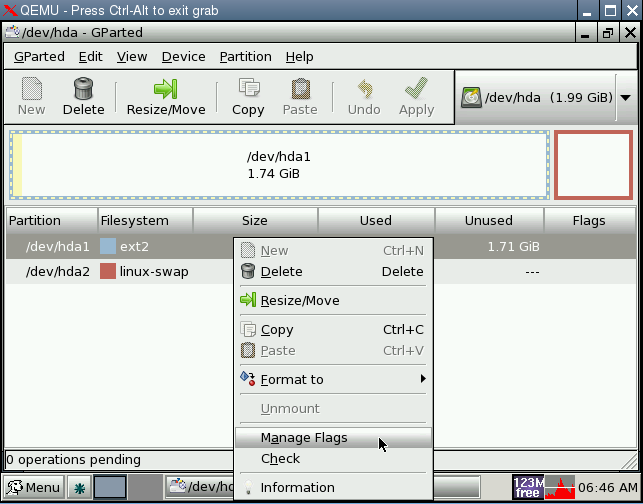
Now click to highlight /dev/hda1
then RIGHT click and select Manage Flags.
Image-16
Now click to select boot.
Image-17
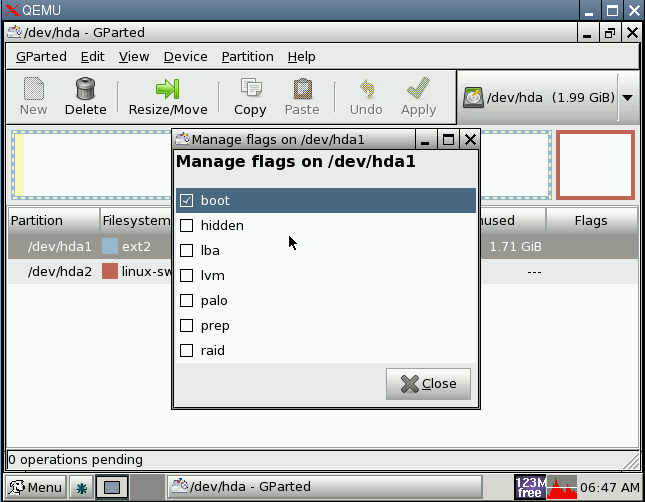
when its ready click on Close.
Things should now look something like this.
Image-18
If so, you can now close GParted, we are finished with it.
Part 3. Install Time.
Now we will use the Universal Installer to make a FULL install to hda1,
followed by installing GRUB to the MBR
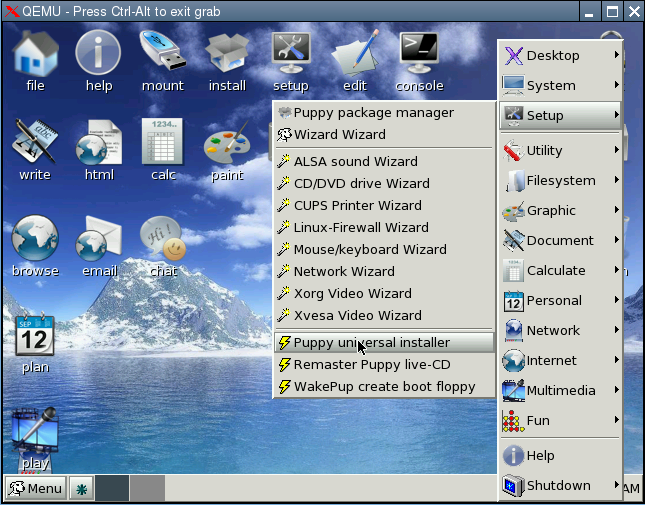
So again RIGHT click the desktop and go to Setup > Puppy universal installer
Image-19
Select Internal (IDE or SATA) hard drive
Image-20

Then click OK
Next choose which drive to install to (in this case it is hda)
Image-21
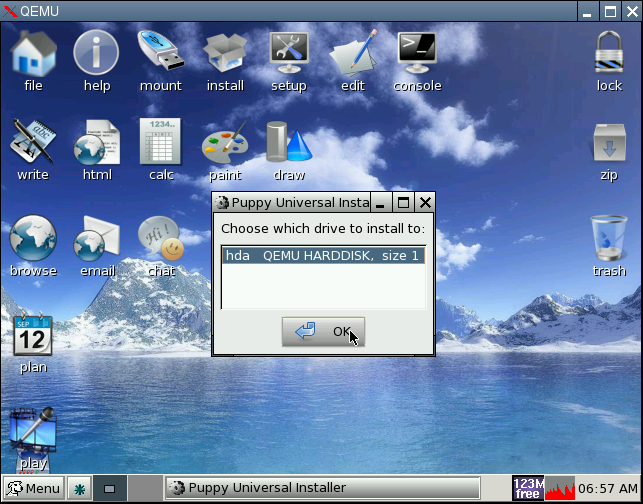
Then click OK
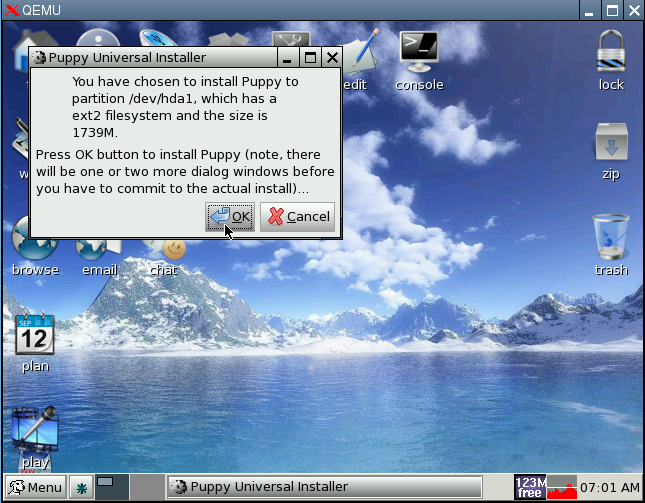
Next select the partition to install to (in this case it is hda1)
Image-22
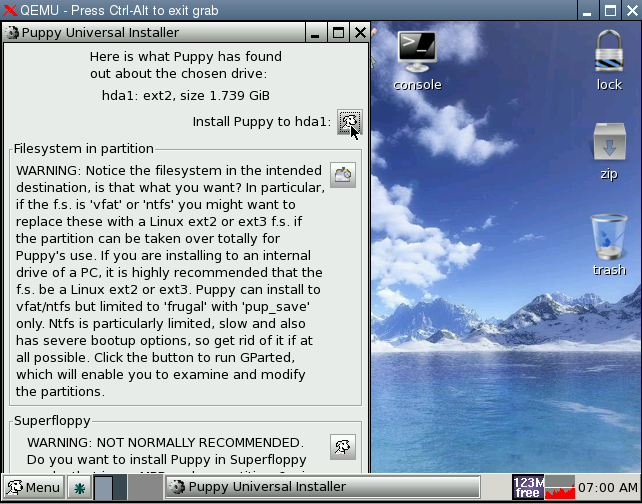
Confirm your choice, by clicking on OK
Image-23
Now tell it where the files are, in this case click on CD
Image-24
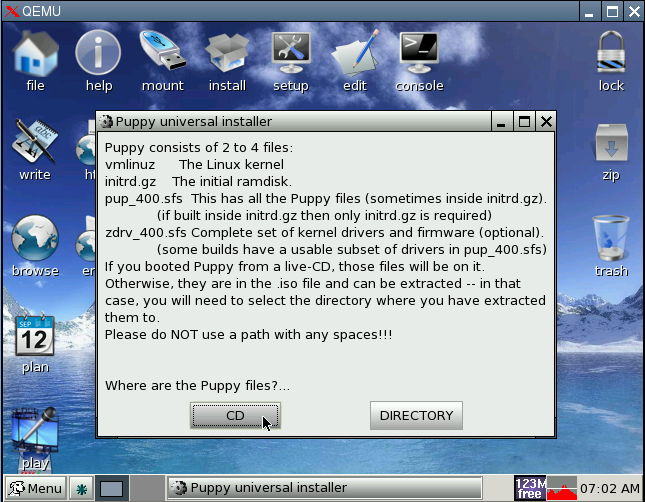
Click OK again
Image-25
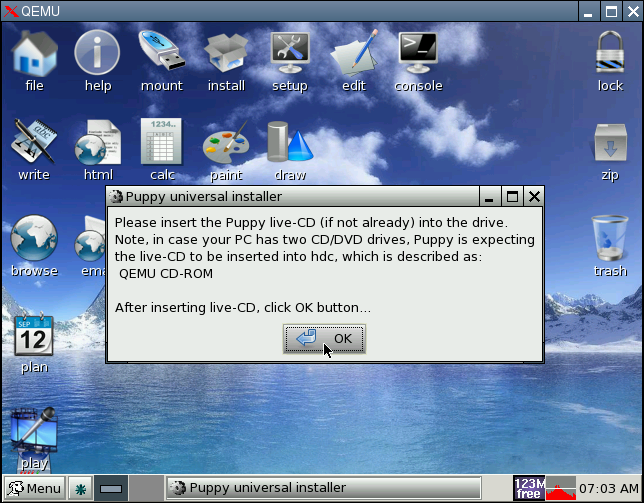
Next we will choose FULL
Image-26
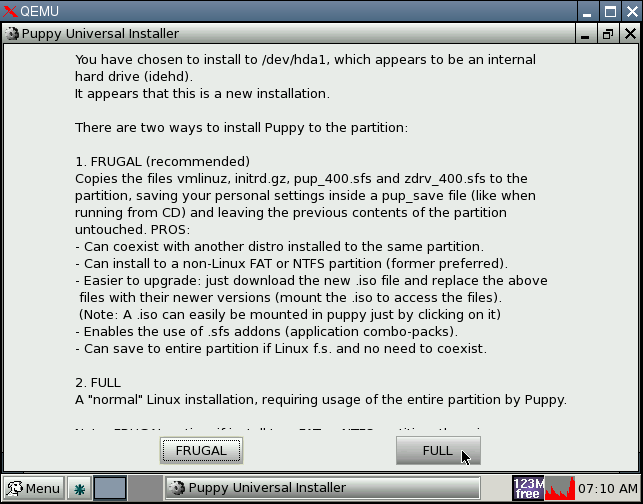
Now wait, while it copies files to the hard drive
Image-27
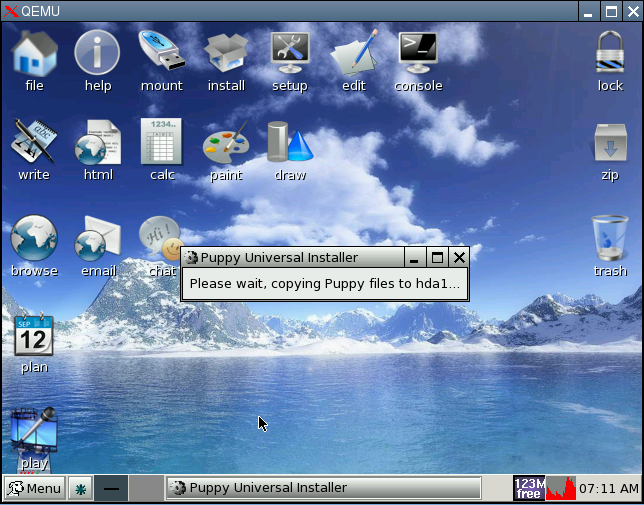
Image-28
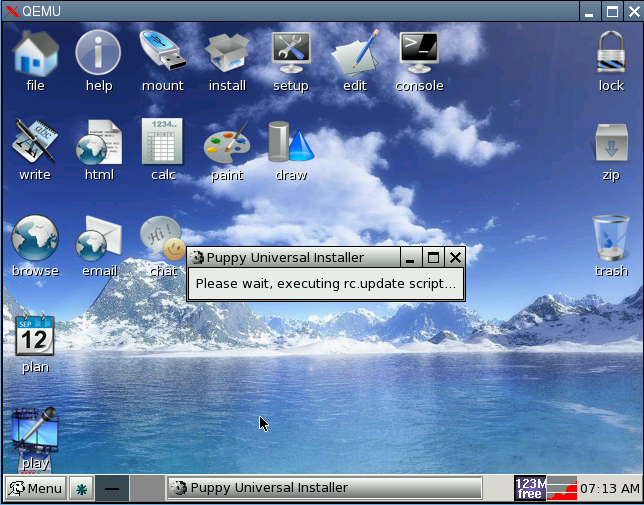
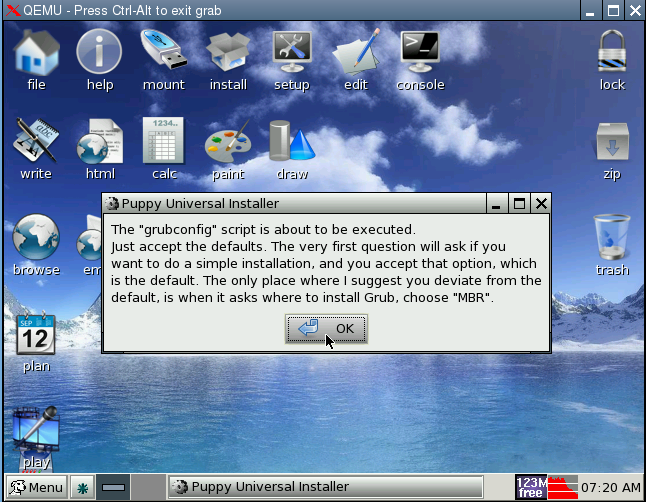
Now we will install GRUB
Image-29
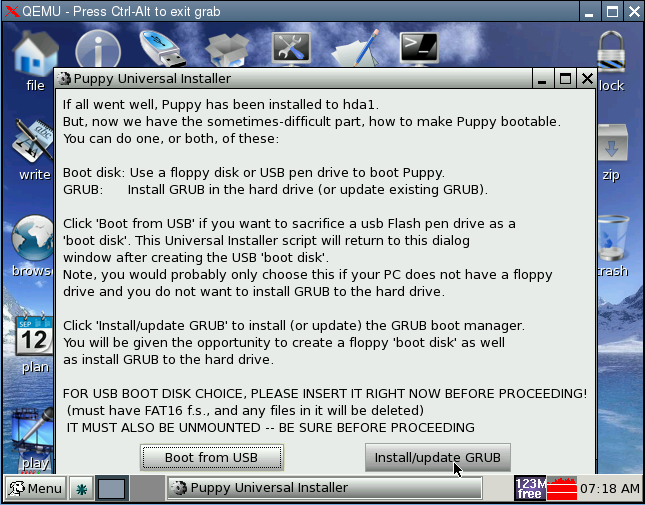
Select INSTALL
Image-30
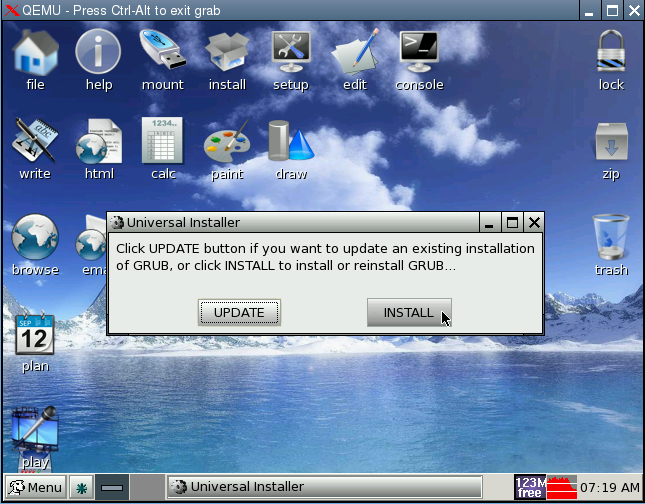
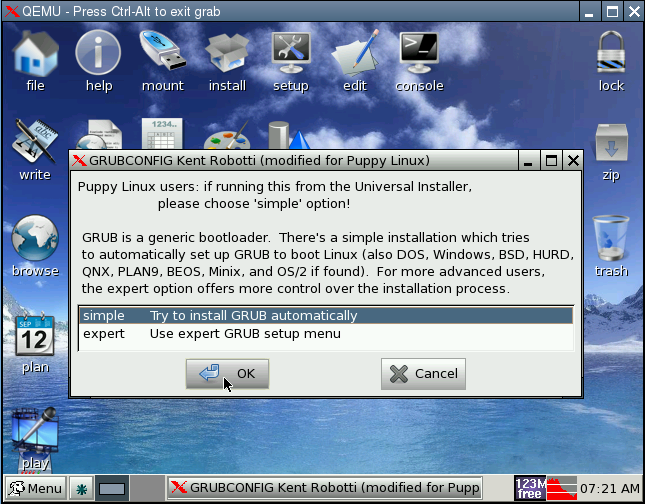
Click OK
Image-31
Choose simple and click OK
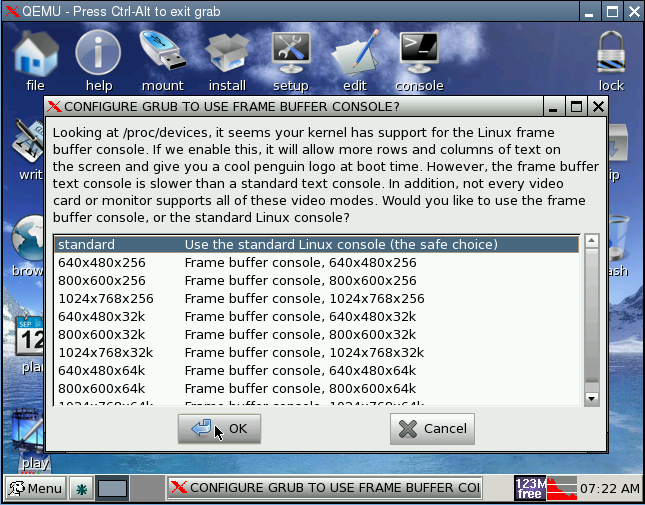
Image-32
Select standard and click OK
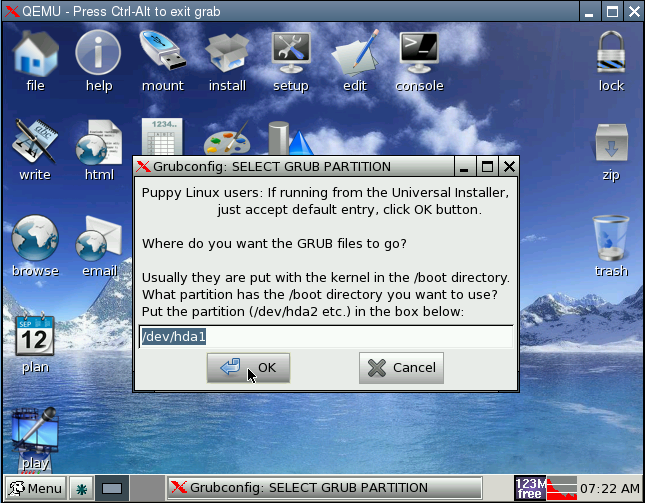
Image-33
Accept the default entry (in this case /dev/hda1) and click OK
Image-34
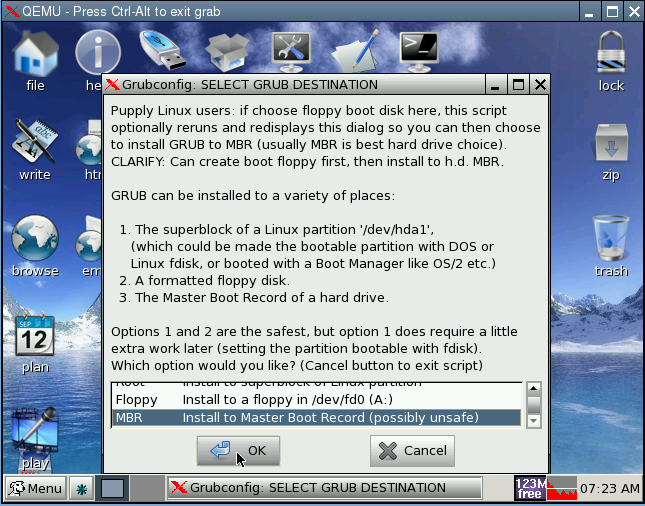
Scroll down the list, and select MBR and click OK
Image-35
Hopefully you will get confirmation that GRUB was successfully installed
Image-36
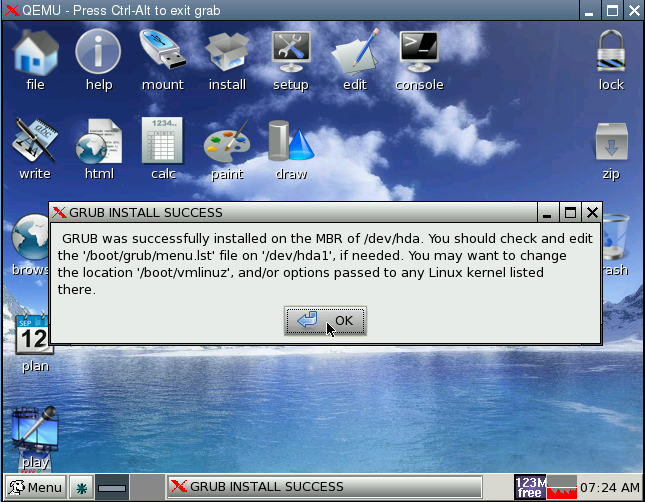
Click OK
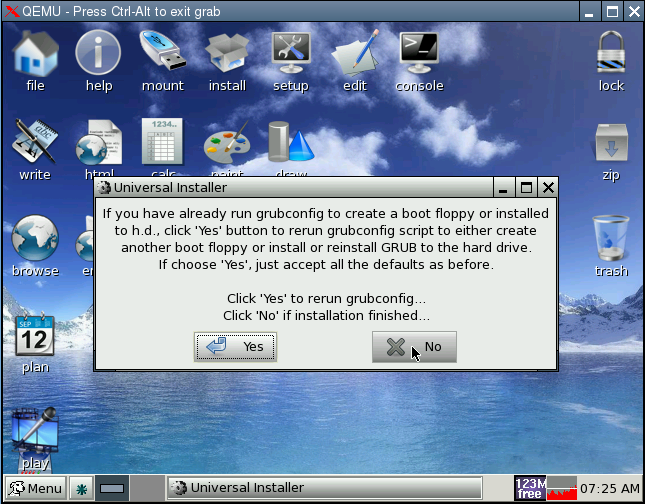
We are now finished with the Universal Installer, so click on NO
Image-37
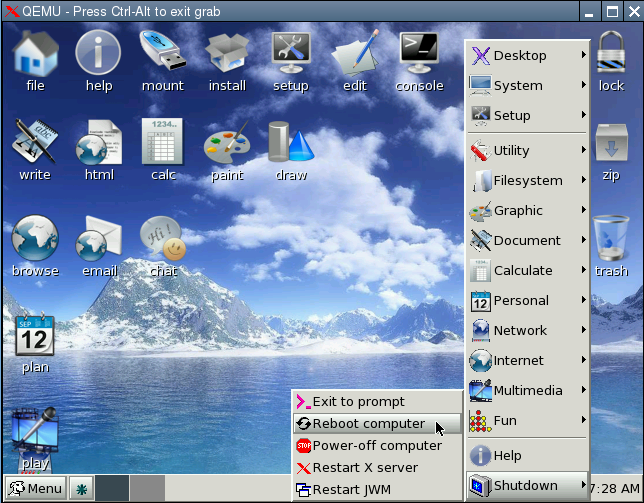
Now REBOOT (REMOVE the CD from the drive first)
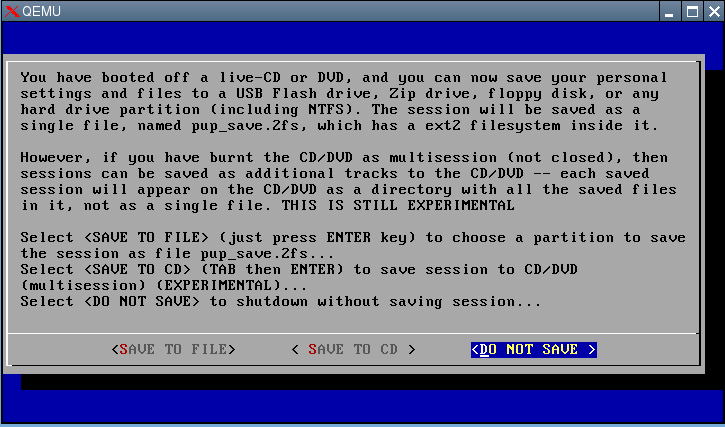
Image-38
Answer NO when asked if you want to save
Image-39
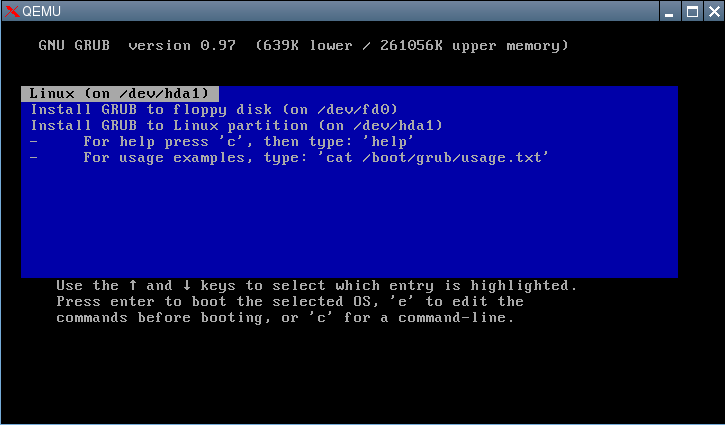
When it reboots, you should see the GRUB boot screen,
(in this case Linux (on /dev/hda1)) is already selected so just hit ENTER/RETURN
Image-40
You will need to make your choice of Keyboard Layout, and Xorg or Xvesa once again.
When you get to the desktop, that is it done.
Next time you reboot, after selecting the partition to boot via GRUB you should go straight to the desktop.
I hope this will help clarify the procedure, for those new to linux.
CatDude
.

